How To Edit Amazing Photos With Snapseed
So, a few people asked me if I could make a Snapseed tutorial. I had never used Snapseed before but now, I’m amazed by the possibilities. Today I'll show you how to make your photos look amazing on your phone with Snapseed and to make it a little more I'm not going to edit just any photo. I'll try to recreate a photo that I edited a while ago in Lightroom and photoshop using just a few tools available in Snapseed. You don't need to do crazy things or be an expert to make your photos look awesome...
How to edit photos in Snapseed like a pro
Editing with Snapseed doesn’t have to be difficult. Just learn these basic steps…
Step 1: Add Contrast
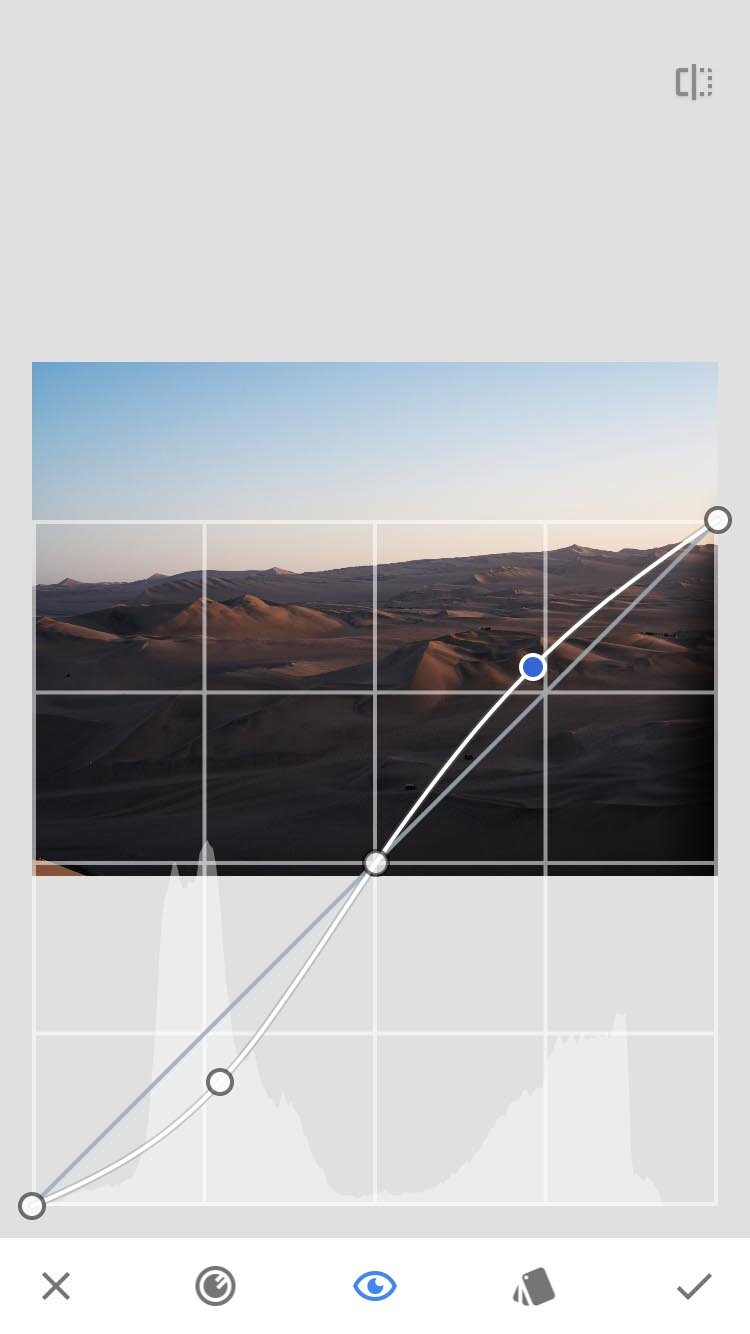
I've opened a jpg file to edit in Snapseed that I made from the original raw file in Photoshop. As you can see, it's really dull so first thing we need to do is add contrast. I always like to add contrast first with the curves tool. That’s how I was taught to do it in photography college.
How to edit with Snapseed.
The easiest way to do it when editing in Snapseed, is to create a basic S-curve. Tap in the middle of the curve to create an anchor point. Tap at the bottom to create another one and pull it down. Tap at the top of the curve and pull it up. Boom, basic S-curve. Tap OK...
Step 2: Adjust shadows and highlights
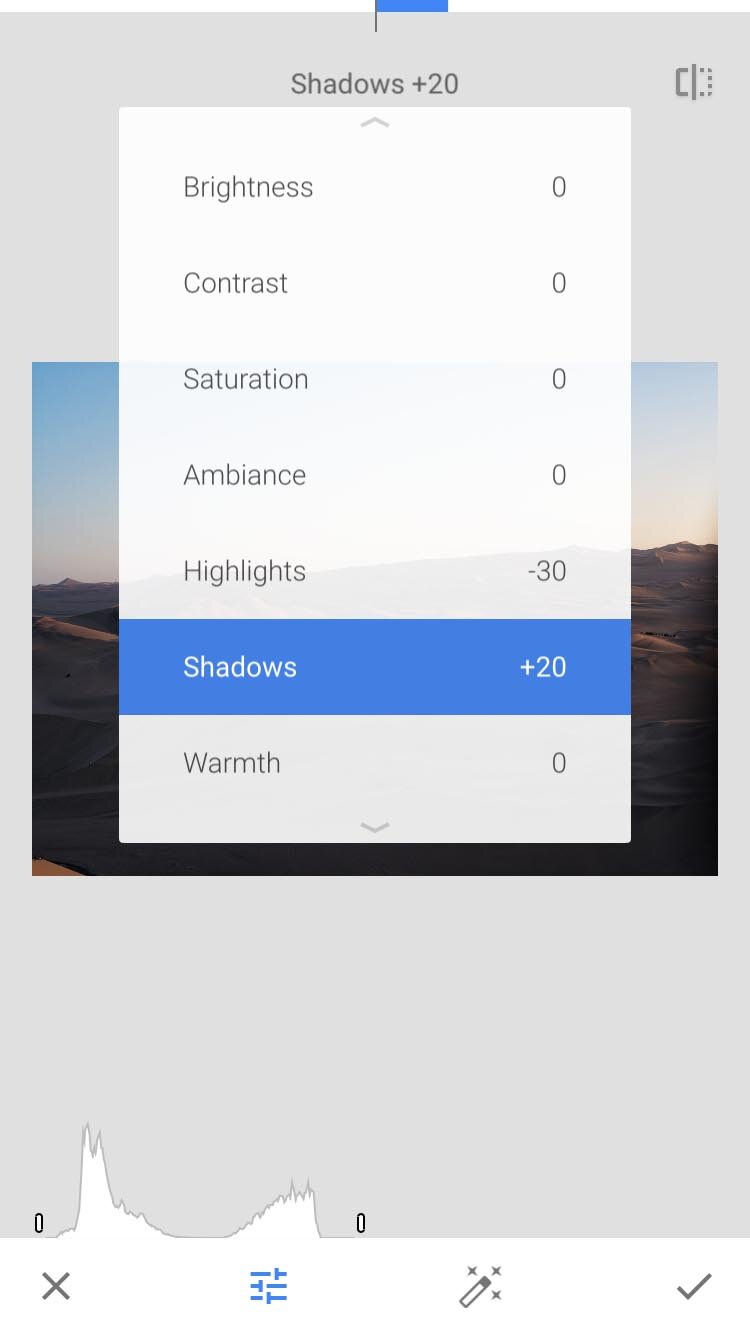
Now, the highlights are a little bit too bright so, I'm going to bring those down first. Go to Tune Image > Highlights. Bring them down. In my example, I'll bring the shadows back a bit too.
Step 3: Selective Tool
Next, I want to bring out the golden glow where the sun hits the dunes. A great way to do that in Snapseed is with the selective tool. With the selective tool you can adjust specific areas of your photo. Tap somewhere in your photo. For me it's there where the highlights of the dunes are and then swipe up or down to select what you want to adjust.
I'll adjust the saturation. Swipe left or right for more saturation or less saturation.
And I’ll also adjust the brightness a little bit.
To increase or decrease the area affected by the selective tool, just pinch with your fingers.
Step 4: Brush Tool
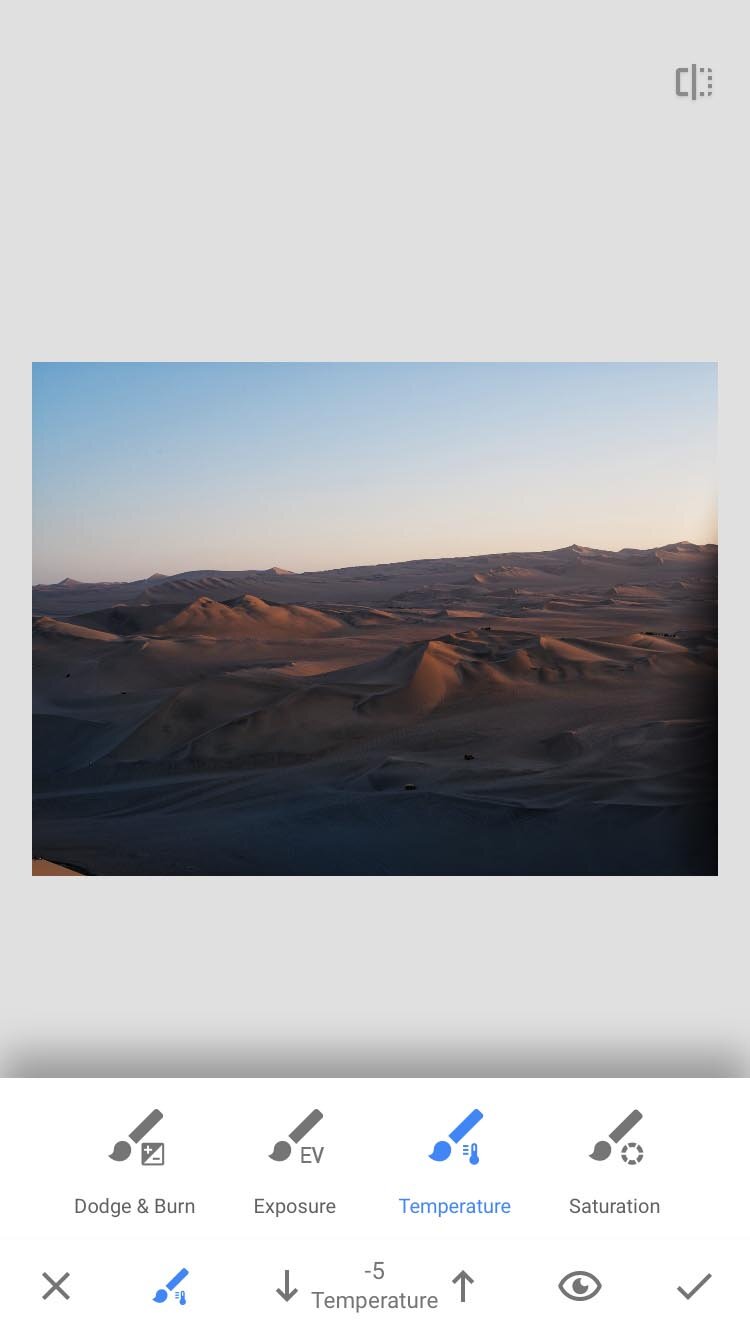
Now, the last thing I want to to is work with the Brush tool. Here you can do some advanced editing in Snapseed with your finger tip.
First, I want to make the shadows down more blue so they contrast nicely with the orange. Select Temperature, set it to -5 and paint over the shadows.
I'd also like the highlights maybe a little bit warmer. So, select Temperature again and set it to +5. Zoom in and paint over the highlights.
Then, I want to make the sky a little bit darker and maybe also the area in the back. Select Expose and set it to minus 3. Just paint over the areas you want to adjust.
Step 5: Tune Image
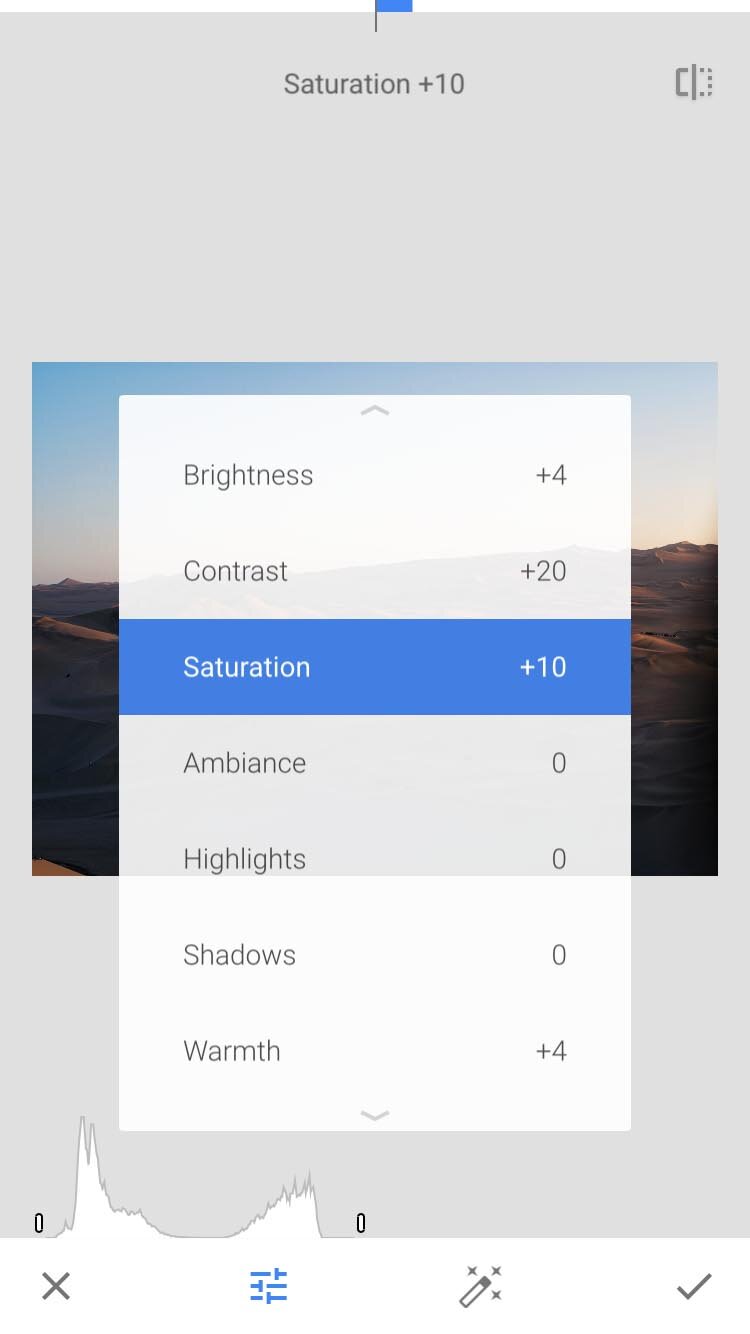
Now, to adjust the overall look of the photo, let's go back to Tune Image. I'll brighten it up a little bit and add a bit more contrast and saturation. This is all a matter of taste and for me usually the last step when I edit in Snapseed.
Additional step: Remove objects
Now, Snapseed can even remove objects. Go to Heal Zoom in and just paint over an object you want to remove. It doesn't always work perfectly. It depends on the image and what's around the object but for mobile use it does a pretty good job. I’m amazed…
All that's left is crop the image and we're done.
How to edit with Snapseed result.


